New Design Proposal for an Artist Studio in Mérida
For the past five months, we’ve been tinkering here and there to improve things in our house that have been bugging us. Instead of boring you with these details (and boring they are), we’d rather just say life is moving ahead and other new design projects are keeping us busy.
We’ve recently developed a concept design for a really cool artist in residence loft in the center of Mérida. If and when this house renovation happens, the loft will house a gallery space in front along with an artist studio upstairs
and entertainment space below
that will lead out to a garden with a reclaimed steel drum acting as a pool.
All of this will be tucked neatly within an old colonial house that’s no wider than 4.8 meters (about 16 ft.) by 33 meters (108 ft.) long.
To keep the space well lit and ventilated, we’re proposing to add an atrium above the dining room that will serve as a huge chimney. Hot air will rise up into it and will evacuate above through a light translucent cover that will also bring light into the spaces below.
For now, life moves forward and all is well. With our house pretty much wrapped up, we’ll be blogging about other new architecture and design work in Mérida in the coming months.
If you have a house that needs work, let us know. Despite a decrease in pool time, new work is always nice.
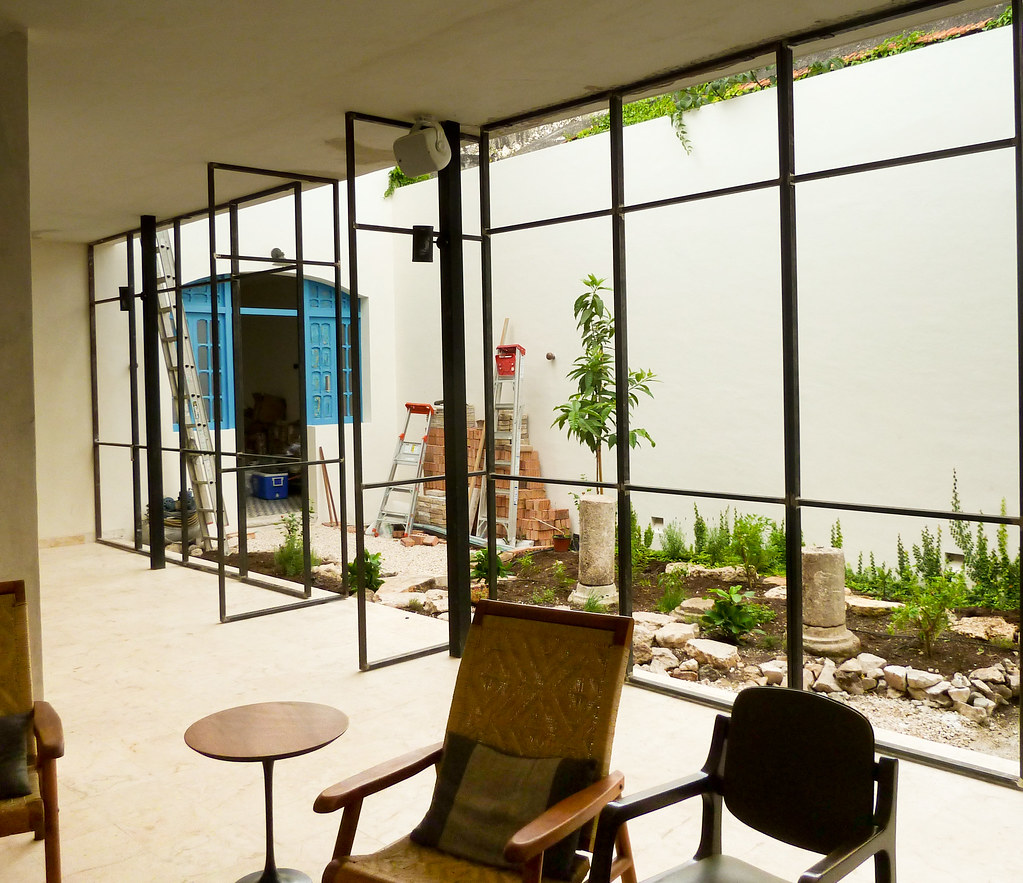
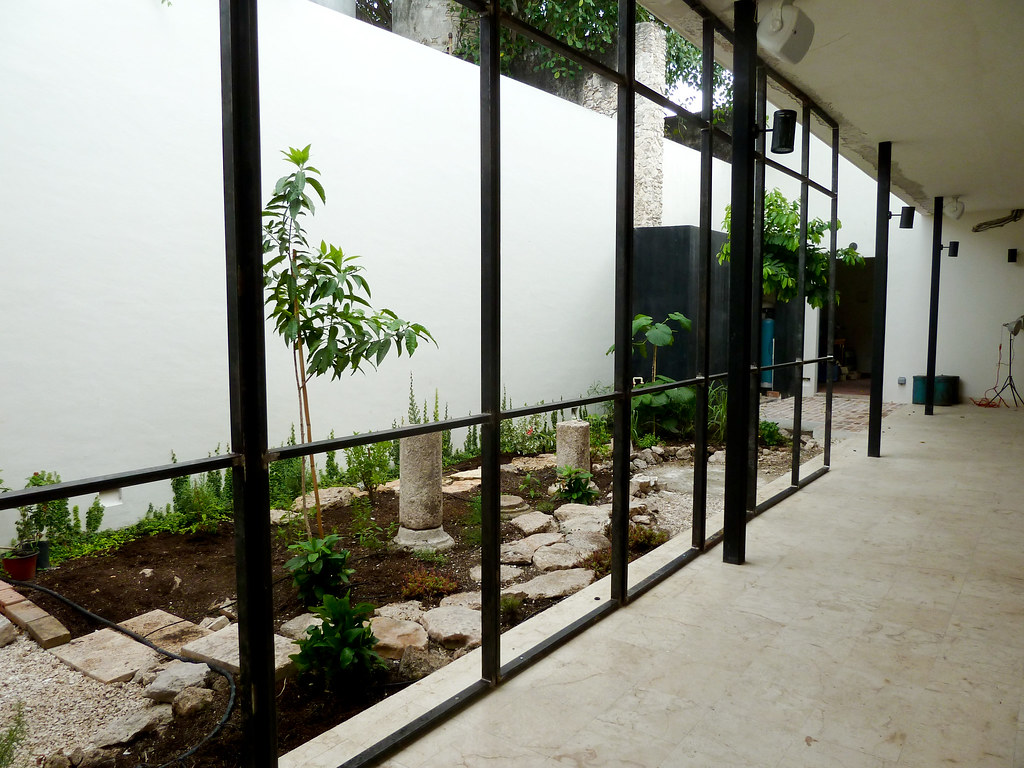
Mosquito Proofing the Outdoors with Large Steel Pivot Doors
For months, we’ve been occupying our outdoor living room sans our large steel pivot mosquito screen doors.
In the beginning, we thought it was marvelous knowing that our outdoor living room connected seamlessly with our central courtyard garden. We felt we were truly outside without being exposed to the elements. Given the cooler weather and reduction in mosquitoes, we weren’t in a hurry to install the screens.
Of late, however, we have started to feel a bit overwhelmed by the abundance of openness. Like our 3-D images showed ages ago (ignore the now incorrect position of our stairwell), the screen doors have always been essential to the demarcating of the “living room”.
The challenge has always been to create an attractive “transparent” separation that keeps mosquitoes out, yet allows views and airflow through. Or in architecture speak - how do you achieve thin profile, frame-less, 9 foot floor-to-ceiling doors that effortlessly pivot open to exactly 90 degrees and stay shut when closed with the minimum number of visible hardware?
Here’s the breakdown:
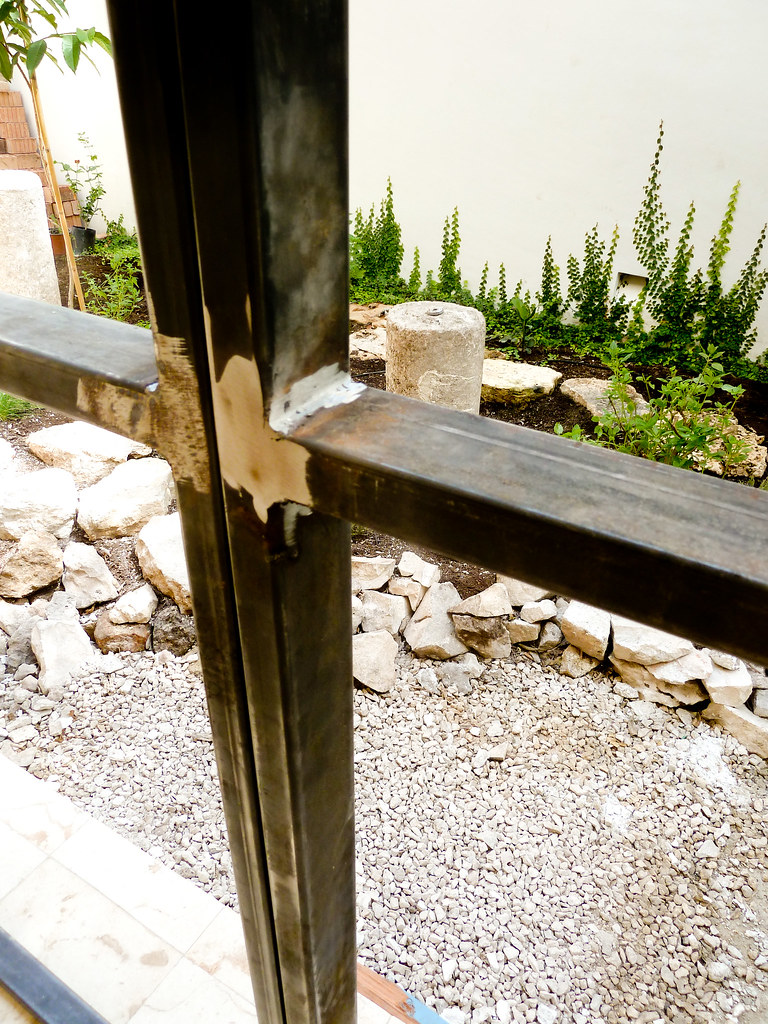
1) Use 2" x 1" tubular steel.
By exposing the thinner 1" face on the vertical face of the door, we achieved a thin-profile door without compromising the door’s structural integrity (as the 2" horizontal surface keeps the doors from wobbling).
2) Create simple pivot hardware that embeds in the floor and ceiling above and below each panel, hidden from view. Off the shelve pivots are extremely expensive, and so we created our own to allow the heavy doors to effortlessly open a full 90 degrees.
3) Level the ceiling to maintain a 3mm gap between the tops of the doors and the ceiling.
This narrow gap is important to keep mosquitoes out, yet very difficult to achieve consistently along the 48 foot span of the opening. Suffice it to say, although our ever-patient albañil got close on the first attempt, there have been a few corrections in places - nothing too large that it can’t be patched when we are done.
4) Purchase heavy-duty concealed screw bolts that fit within the narrow 1" profile of the doors. Luckily, these bolts, with a finish of oil rubbed bronze are an exact match for the final door color. As such, no painting required.
5) Install industry-strength magnets in the ceiling.
These magnets are, as the manufacturer warns, not your average fridge magnets (as is evidenced by a blood blister that appeared on Stan’s finger after being caught between two of them). Embedded in the ceiling, these magnets will hold our doors open, and closed, at a perfect 90 degree angle with invisible magnet magic.
With the initial fitting and adjustments almost complete, the doors will soon be taken down, and sent for painting. Mosquito screens will then be attached, along with door hardware, and finally, 16 three-meter-high steel pivot mosquito screen doors will be fully installed - just in time for the rainy season and the onslaught of mosquitoes!
Hello world. We wanted to let you know that we’re not dead. This past holiday season brought a last-minute escape to Buenos Aires, Argentina and Montevideo, Uruguay to “renovate” our spirits.
Travel, along with a much-needed break from the daily grind brings us back feeling refreshed and ready to tackle the new year with gusto.
For now, we leave you with a couple teaser images of what’s to come:
1) After days of toiling in the sun, our garden finally takes shape with partially completed brick paving!
2) We didn’t think the day would ever come, but our kitchen actually arrives (well, 1/3 of it - just enough to make a mess), poco a poco!
Stair Carpentry - A Simple Design to Please Your Inner Architect
The last time we mentioned our staircase, we were reveling in the fact that we could travel between floors without either having to climb a ladder or negotiate a rather steep makeshift ramp.
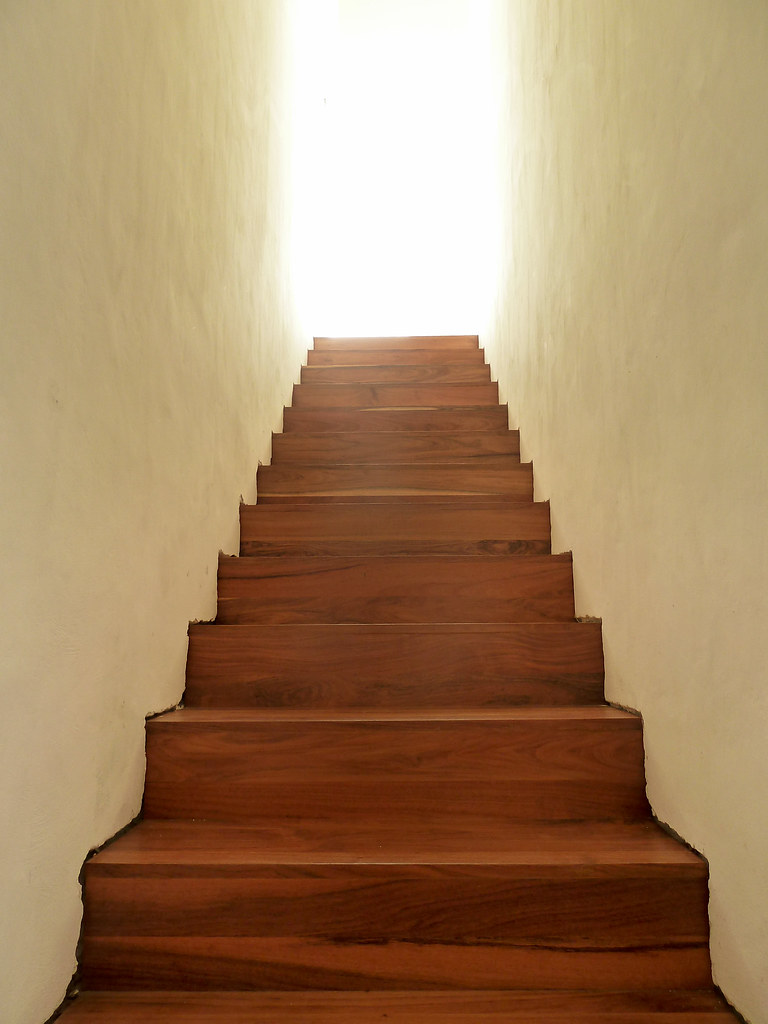
My how time flies. After watching the stairwell go from a drab gray concrete tunnel to a more spritely white-washed shaft of light, we have now witnessed its final transformation into the wood-clad beauty we designed.
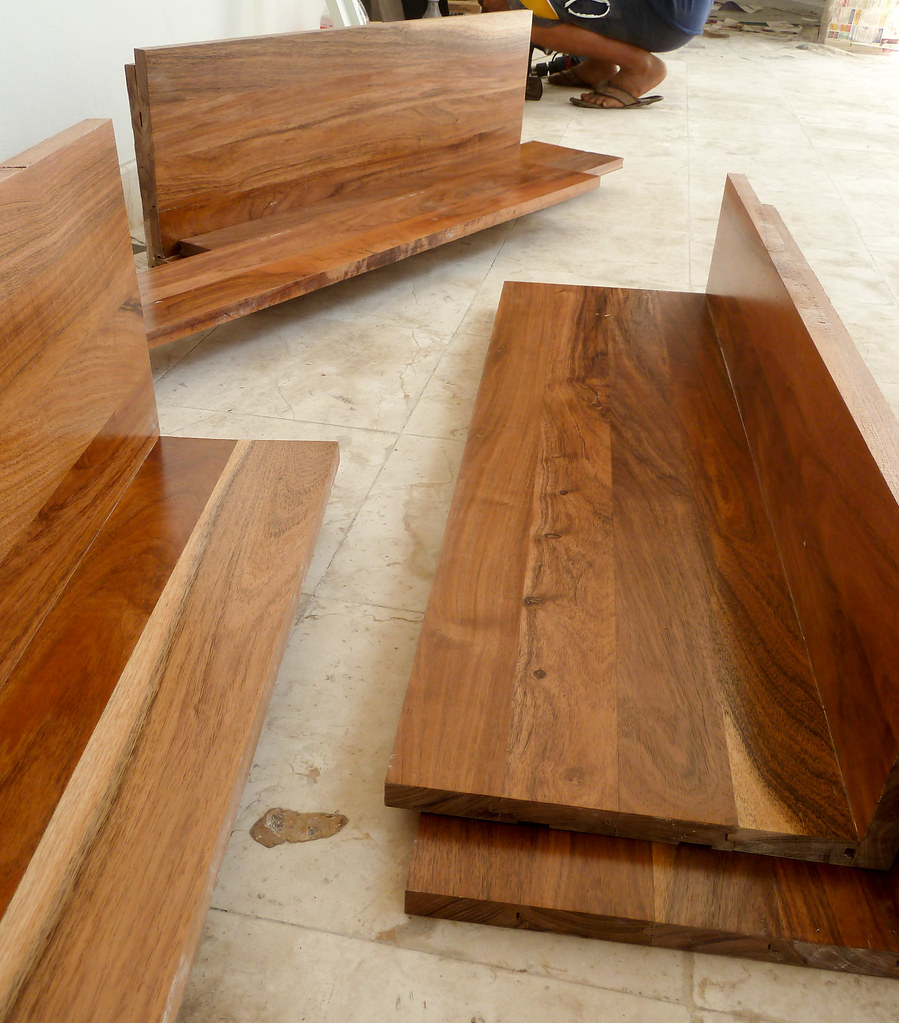
Using tzalam hardwood we purchased ages ago, our carpenter cut, joined and assembled units consisting of one riser and one tread, screwed together from behind where it would not be visible once laid.
On the underside of each panel, grooves were cut to help prevent the wood from warping. All this work happened in the workshop where precision was better, quicker and cheaper. Delivered to site, the idea was to nail them together to form the stairs.
In advance of their arrival, the concrete base of each stair was leveled and a little bit of the concrete picked out on each side so each stair could be embedded in 1/8 inch.
This embedding is easier than cutting the stairs to the exact dimension and relying on the walls being exactly straight (in Mérida renovation projects, they seldom are). Embedding the stairs a little makes this a moot problem as an albañil simply has to return after the stairs are in and patch the gaps with new cement.
To blend the paint, we have asked the painters to taper down to a single coat as they near the edge of the stairs. Some would say this is obsessive - but hey it’s our house and we’ll notice if it’s not right.
Anyway, back to the stairs. Once delivered on site, installation began at the bottom, moving up one step at a time. To adjust for small variations in the height of each step, a little wood was planed from each step to make a snug fit.
Surprising for us, the stairs weren’t actually fixed to the concrete, but instead secured to each other with “invisible” carpentry nails to form a solid run, whose overall weight would prevent any movement.
A day of installation and everything was in. Another day to putty the seams, and yet another to polyurethane them and the stairs are complete-ish.
Although we still need to rustle up an albañil to patch the concrete, such details don’t stop us from smiling. Every architect loves a good staircase, and Stan is no exception.
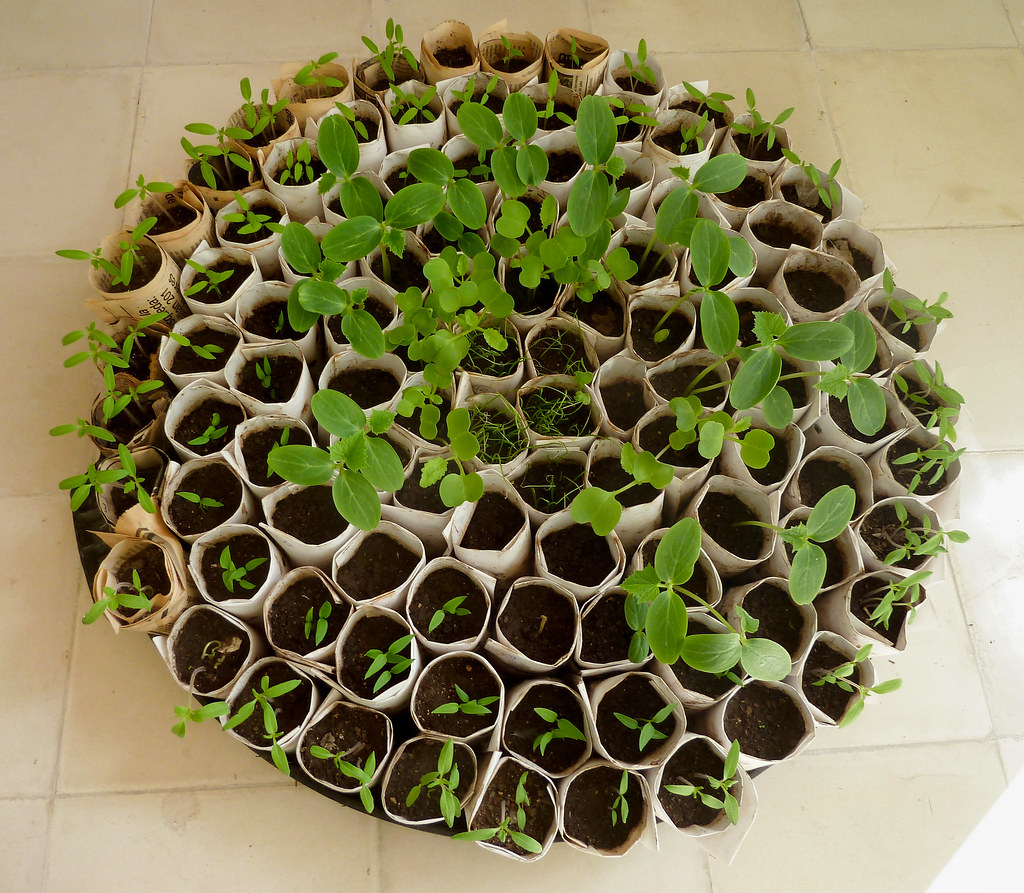
What? Have we gone mad? How can it possibly be springtime when we’re north of the equator and were headed into winter?
The answer lies in the following image.
Unlike further north, the prime growing season is now upon us. With the heat behind us and tropical storms abated (well, almost), the air is feeling positively springtime and it’s perfect for growing yummy things.
Unlike our previous attempt at growing edible goodies, we now have our first opportunity to take advantage of Mérida’s four-month-ish growing season and see for ourselves what possible wonders will pull themselves from the earth and onto our table.
To start, we have plenty of Asian varietals like Korean radishes, Chinese cucumber, Japanese kabocha squash, and a bounty of leafy greens. In our past experience, they tend to be the hardiest. Mixed in with these are some other reliable croppers like heirloom tomatoes (using seeds we kept from last year’s treasures), chili peppers and eggplant (a surprise hit, as even in the heat of actual spring in Mérida, they grew and grew).
And just to make things interesting, we’re trying some past failures like fennel and green beans (we shall see).
Even more exciting is our incoming drip-irrigation system. This simple system will provide a “water light” solution to keeping our plants drinking happily until the rain begins again next May. As water is delivered, drip by drip, and not via the gush of sprinkler or hose, there is less change of stray water pooling on leaves and pathways and inadvertently creating an unfortunate mosquito problem.
Now all we need is a delivery of compost and organic soil, as well as a few additional components for our drip irrigation system (okay, and the rest of our hardscaping delivered and installed). However, who wants to dwell on details? We can taste our freshly-plucked tomatoes already.
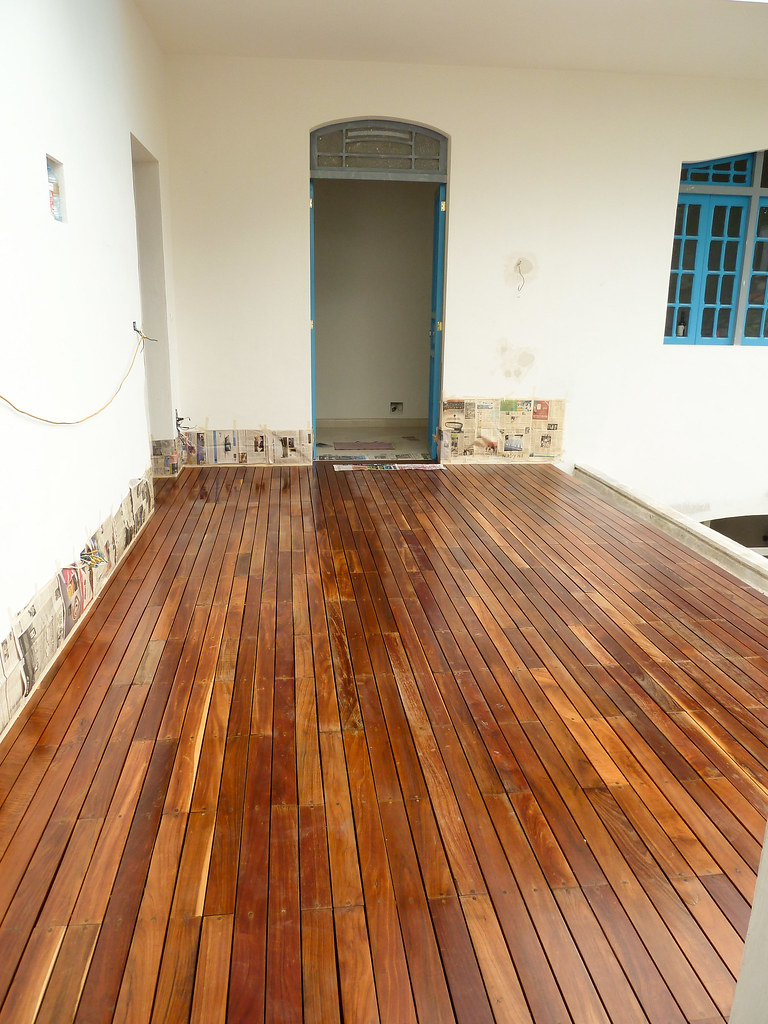
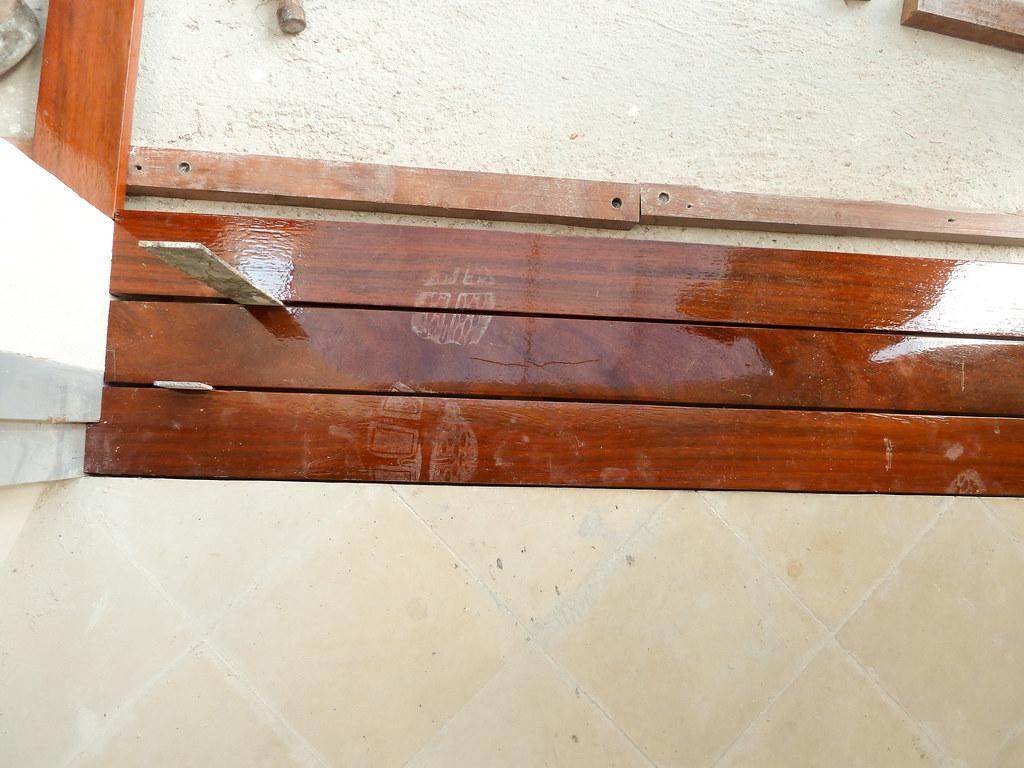
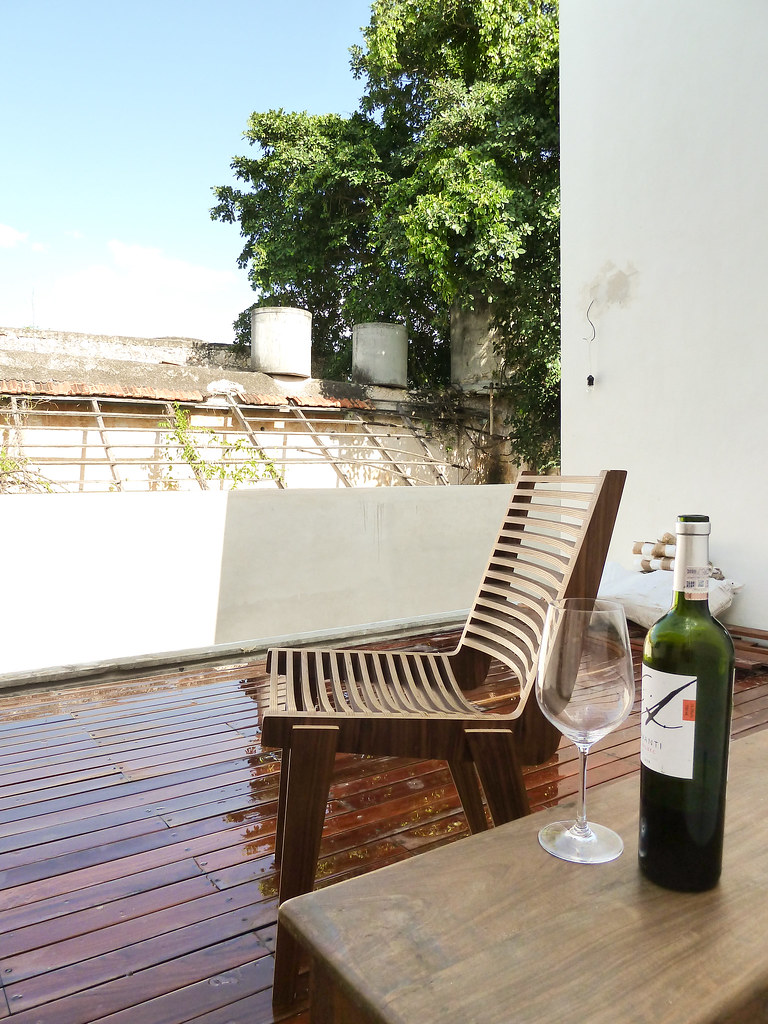
After many months of production and installation, the wood terrace connecting our two bedrooms is finally complete (okay, maybe it’ll be tomorrow morning because of the rain).
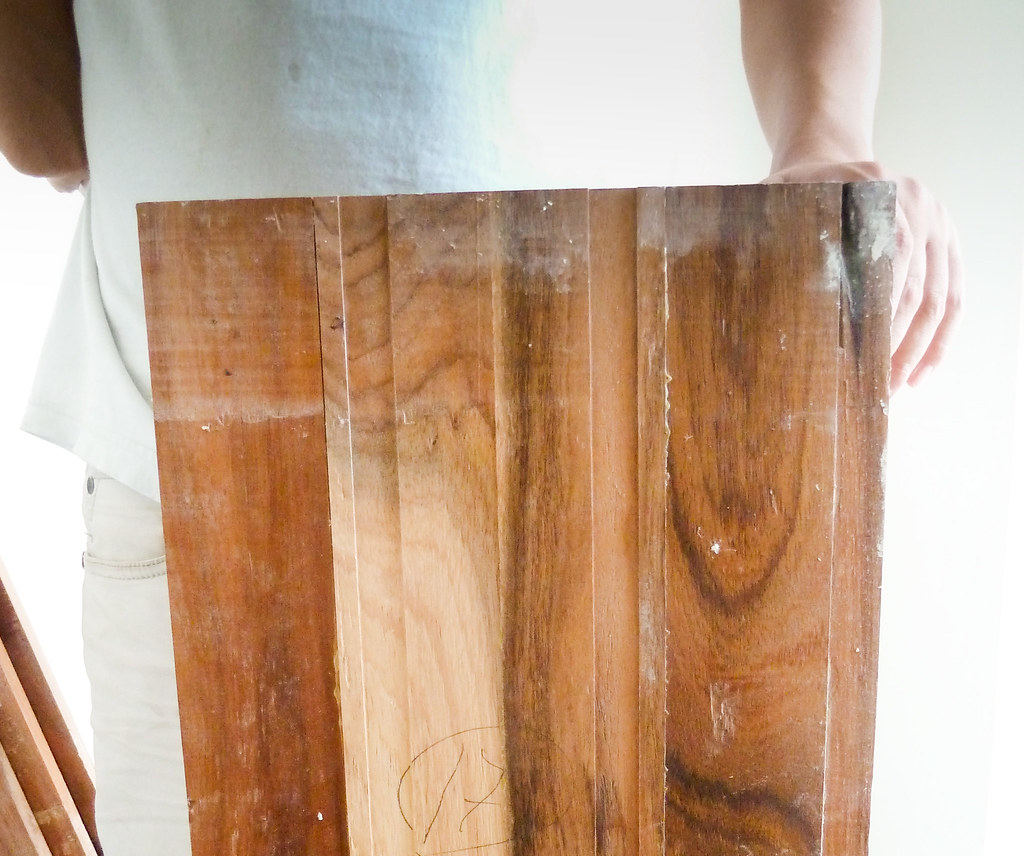
Constructed from tzalam wood, this wood has been sitting in our carpenter’s shop for over a year drying and being processed for use on our terrace.
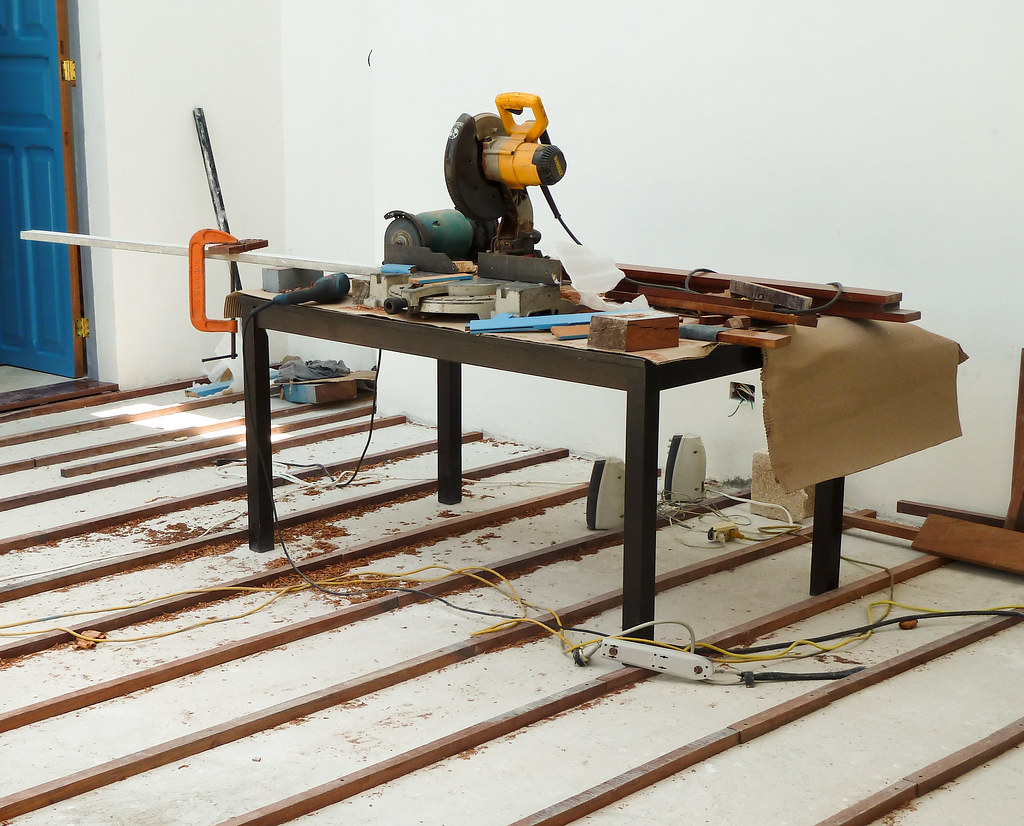
With a flooring design in place, our carpenters were on site to begin the slow and deliberate process of installing the floor, board by board according to the following pattern.
First, the framing. Essential to creating structure and providing a solid connection point between the concrete foundation and the floor board above, the framing system was spaced out evenly, allowing sufficient gaps for water to flow underneath, but not enough for the boards to sag.
Soon after, our carpenters requisitioned our dining room table and clamped a circular saw to it so they could began cutting the individual boards to size.
While one person cut, another spaced the boards using a few 5mm planks, while yet another person screwed them into place.
Once 95% complete, the floor was laid to rest and settle for nearly three months.
Treated with polyurethane, the idea was to let the sun take its initial toll on the boards, allowing some of them to fade slightly and thus produce some more rustic undertones to the floor.
Being new wood, the three-month holding process also allowed the boards to move and shift until they could settle into a more “permanent” position. The boards that moved too much would eventually be replaced (5 in total).
Finally, a week ago, our carpenters returned to finish laying out the final 5% of the floor, sand down the entire thing and replace all warped boards. Sealant was then applied, and as of yesterday, the first of two coats of UV-resistant polyurethane was applied.
With a round of sanding to go, a second application of polyurethane, and a final touch-up sanding to smooth out any residual glops of finish, a key component of our build will finally be complete. The quiet evenings spent relaxing on our terrace will be made even better as we proudly sit sipping on wine atop a completed wood terrace deck.
While camping at our house, we’re also grilling, a lot. Here’s our version of arrachera tacos with poblano chilies. Watch the video (you also get several glimpses of our house) then head over to the recipe and get grilling.
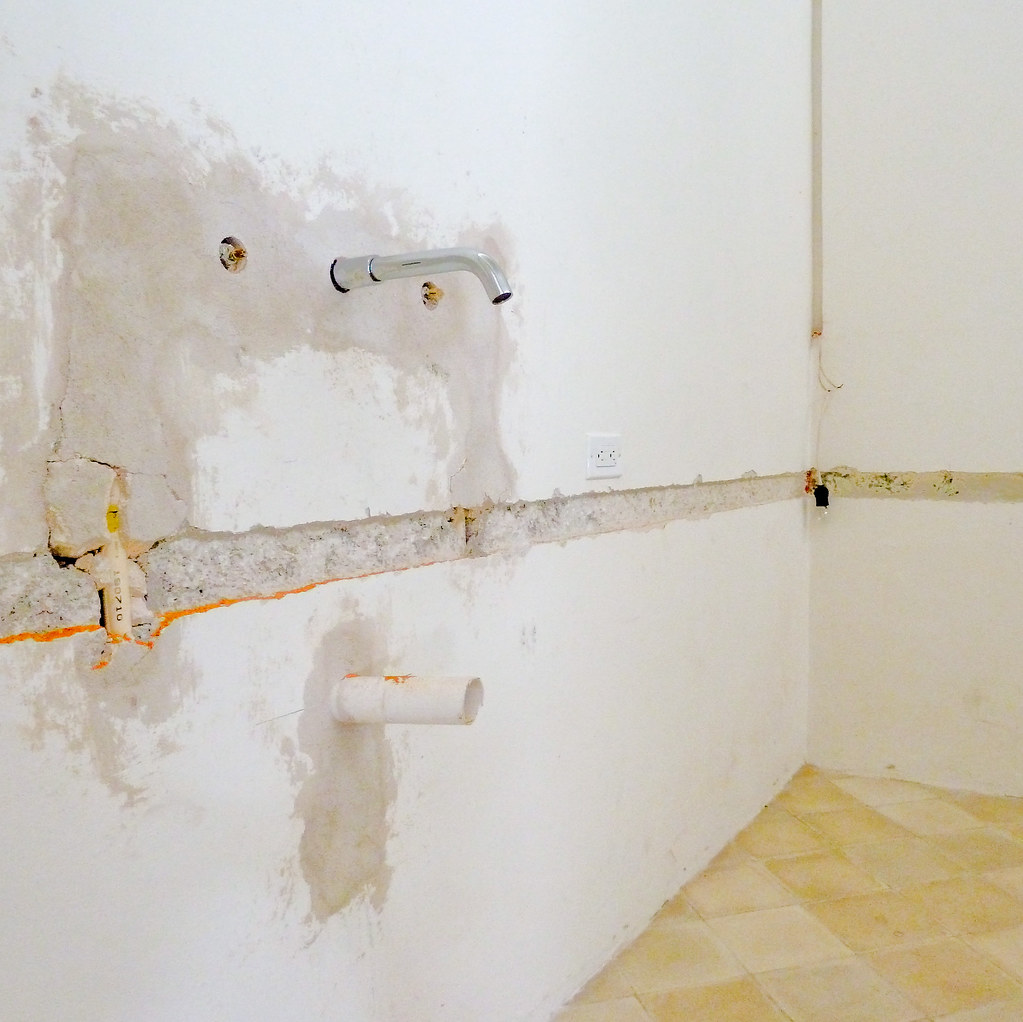
It’s been over a month since our last excitable post about our pool, so we thought it was high time we resurfaced and assured everyone that we are still alive and kicking.
We’d love to say we’ve been relaxing poolside while our crew wraps up around us with efficiency and outstanding speed. Alas, that would be a lie. Instead, we find ourselves mired in the painful phase of corrections - a process that seems to take us two steps forward, just to bring us back another three.
For instance, our guest bathroom vanity is supposed to go here.
There was in fact a moment when it was here, but due to some issues we had with the positioning of the drawer (it was wrong) and a curious downward slope on its left end, the vanity had to be pulled from its spot and sent back to our carpenter’s workshop.
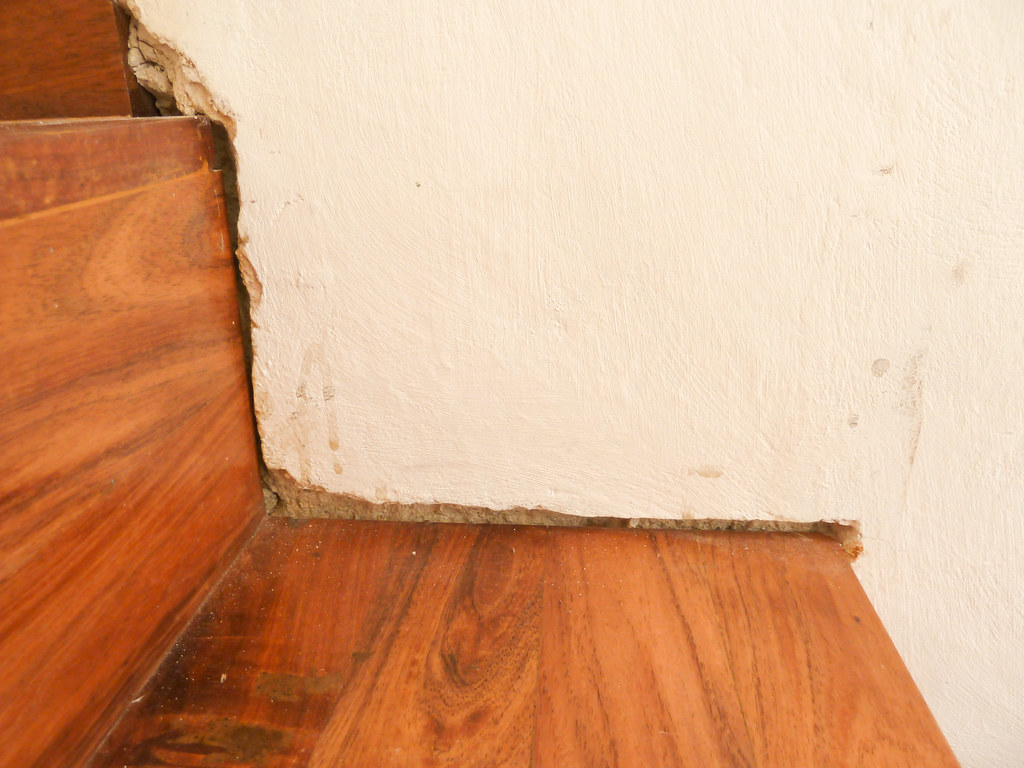
This patch of missing pasta tile has been like this for about a month now.
We have the tile and could install it tomorrow, if not for the fact that the temporary steel door (shown in photo) was installed too low and would not open if we were to install the tile now. To finish up, the temporary door needs to go.
For that to happen, however, the colonial wood door beyond must be restored, which entails first removing and replacing the rotted door frame. Although the frame could go today, a new one can’t be installed until the facade is refinished and the new frame cemented into place while the door opening is reconstructed.
This long chain of events involves our carpenter, a couple albañiles (masonry guys), a tile guy, and electrician (for the doorbell). Time to completion? How long is a piece of string?
This mess in our rear garden is due to the fact that lines of conduit and plumbing were incorrectly positioned directly underneath our future garden. At a depth of 20cm, our concern was that there would be nothing but trouble when we (or our gardener) began tilling the soil and split a water pipe (or worse electrocute ourselves when we cut through a conduit). The solution? Dig it all up and push it to the right so it falls underneath a brick walkway.
These three items have 137 “friends” nailed to a board in the kitchen. As is typical during the end of construction, the list is long and we are measuring our progress daily. A lot of people worry about these things further down the line. We, however, have the energy and inclination to get things done right now.
Some days the issues list drops by inches, other days not so much. On those days, we remind ourselves that although we are sweating the small stuff, we still have a pool to cool off in.
Being sans pool these last 12 or so months, our friends have taken pity on us with invites to swim at their houses. Their kindness has at times helped us from completely losing it during the hot days spent on site supervising the build.
This weekend, however, we are no longer a charity case as our pool is full up with cool aquamarine. As of 1:13pm yesterday, the pump stared up and water gushed forth. Despite waiting 18 months for this moment, watching it fill inch by painful inch over the course of five hours was agony.
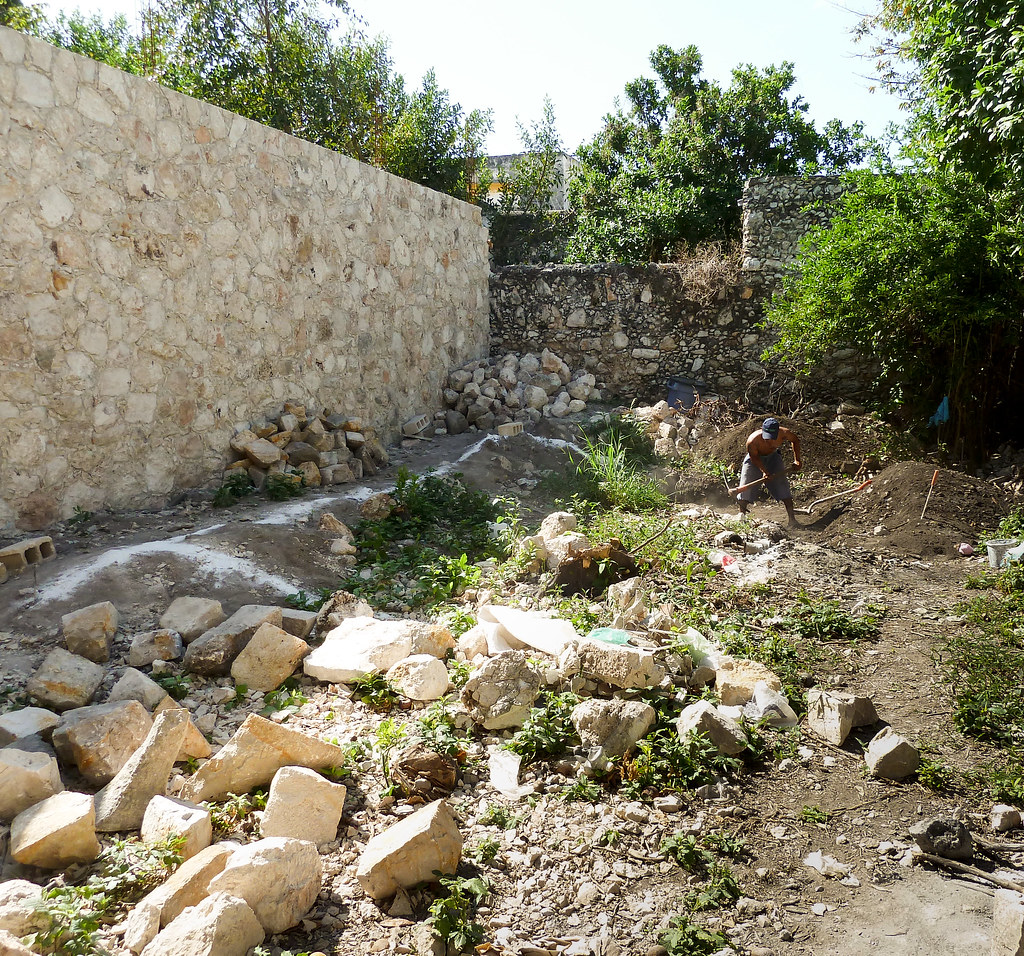
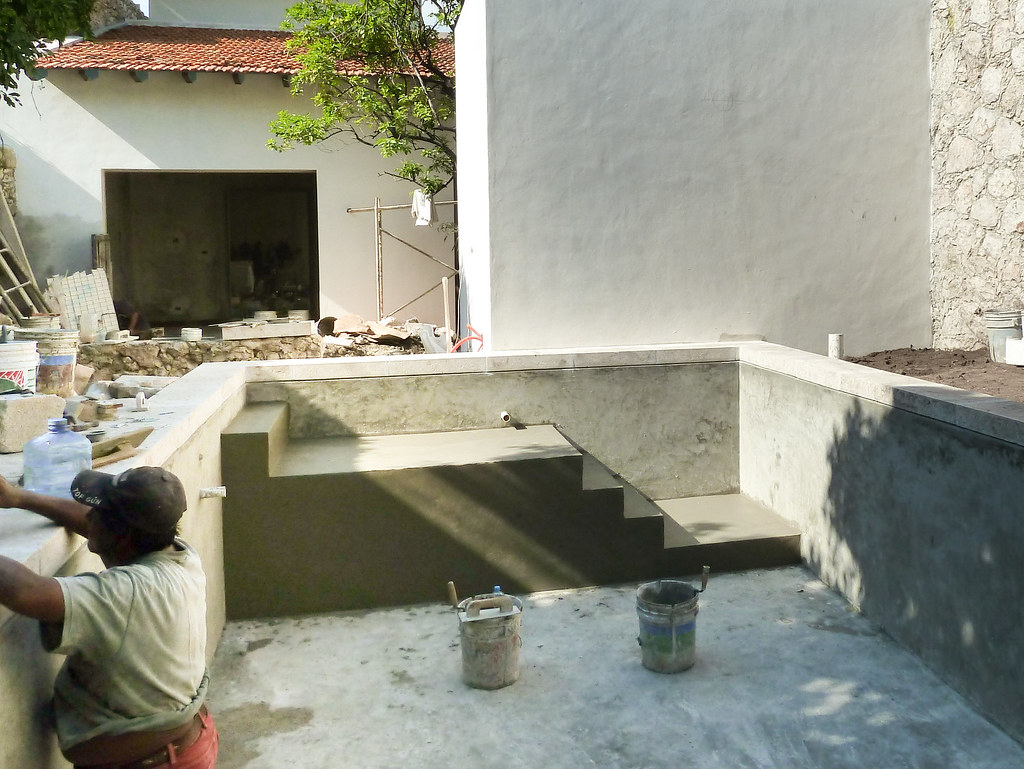
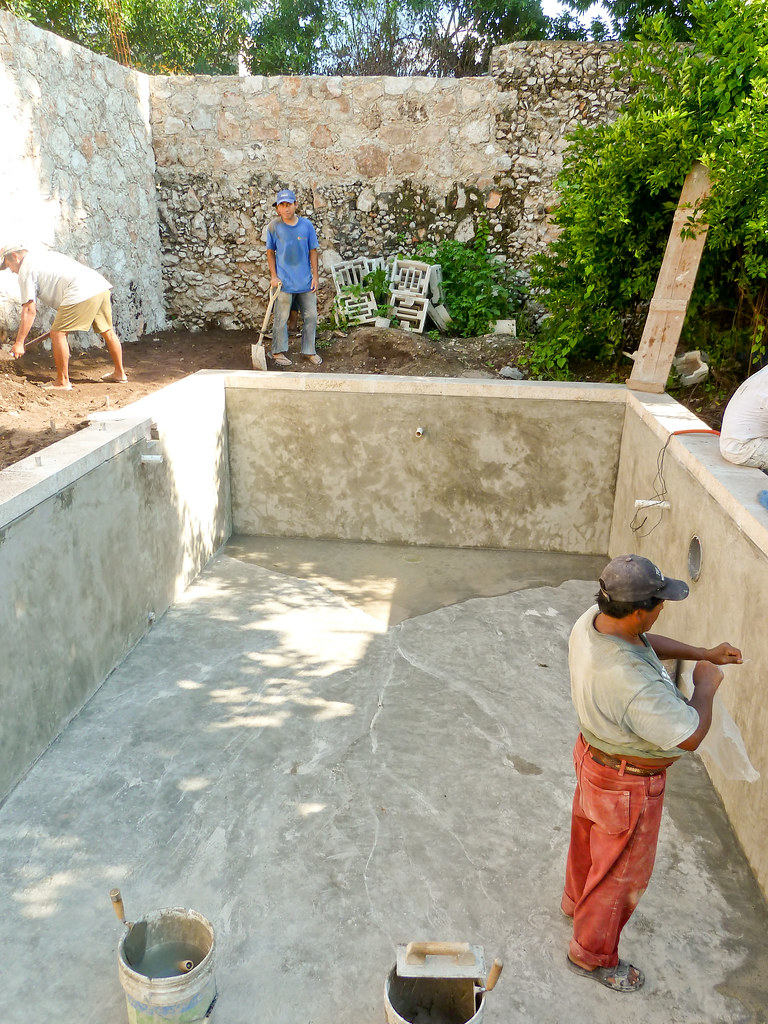
The pool has been under construction since the beginning of March. Since those early days when the crew marked out the boundaries with spray paint, it’s been a slow and deliberate process getting the pool to its current state.
First up, the dig. Unlike many horror stories we’ve heard of people bringing dynamite to the site to blast through limestone boulders, we had one kid who spent three weeks shoveling nothing but fluffy nutrient-rich soil with nary a stone in sight (the ones you see piled up were brought in by us for other purposes).
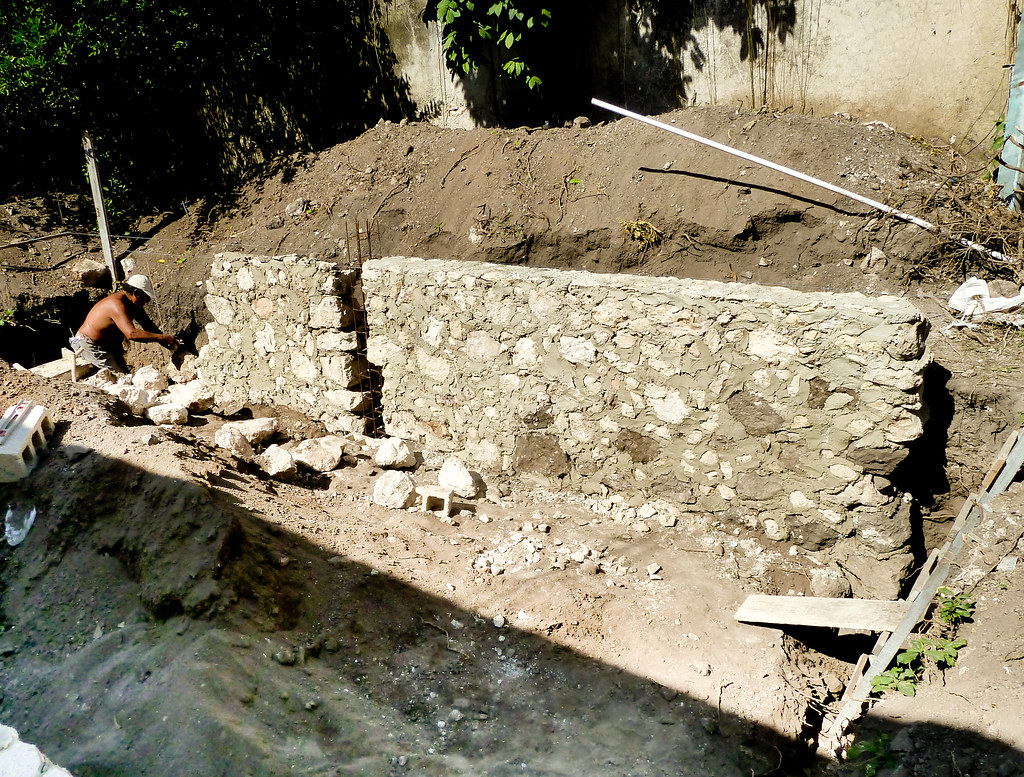
Then, as with so much in Mérida, it was time to build a mamposteria wall running the perimeter of the pool, acting as both sides and footing.
Nearing the end of May, with the temperature soaring, the mamposteria wall was plastered with a hand-mixed concoction of grey concrete and festegral (a powdery substance that is added to concrete to make it waterproof).
The choice of concrete color (or any other finish for that matter) impacts the resulting color of the water (you can get an idea of how it works here). We chose a darker grey, which gives the water a rich turquoise color. Darker colors do cause the pool to absorb more sunlight and warm the water, but we will be balancing this out by erecting a summertime-only shading solution.
For the pool edging, we opted for a stone cap of “tok”, a local limestone that complements the stone wall bordering the rear garden. Working with a stonemason in Dzitya, a town specializing in stone work, we obtained thick machine-cut blocks which were scored on a diagonal to give a rough, non-slip finish.
By mid June, with our friends growing tired of our constant come-ons for a swim, it was time to get things finished up. The steps and platform went in by forming mini mamposteria walls, filling them with rubble and finally forming the steps with a layer of concrete/festegral plaster.
Finally, with yet more plaster and a little wire mesh, the floor was laid along with the plumbing and various other boring details (our patience was wearing thin).
Since moving in two weeks ago, we have purposely not asked our contractor when the pool would be completed so as not to appear naggy and perhaps a little disappointed. This approach seems to have paid off, for we were taken by surprise yesterday with news that things were ready to fill.
Granted, our salt water purification system has yet to be installed and our filter is not yet functioning, but for the next few days, we will enjoy our sparkling new pool. Yes, we have a bit more to do, but now wallowing in watery bliss, the end is truly within sight.
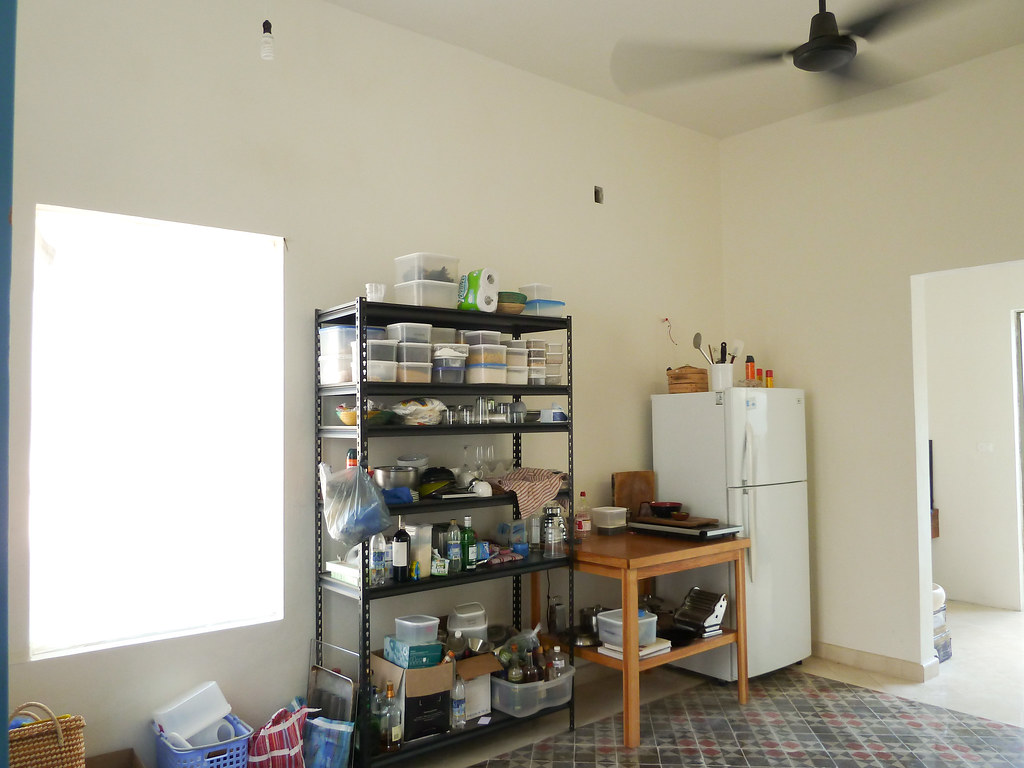
As of a week ago, we are living in our new home. It’s not done yet, but with the lease on our rental accommodation up, we had to move.
Living in a house under construction is no picnic. With 15 workers on site each day, hammering, sawing and asking a million questions, it’s hard to concentrate in the din. Dust flies everywhere, and although we are living upstairs where construction is largely complete, everything is constantly covered in a thin film of polvo.
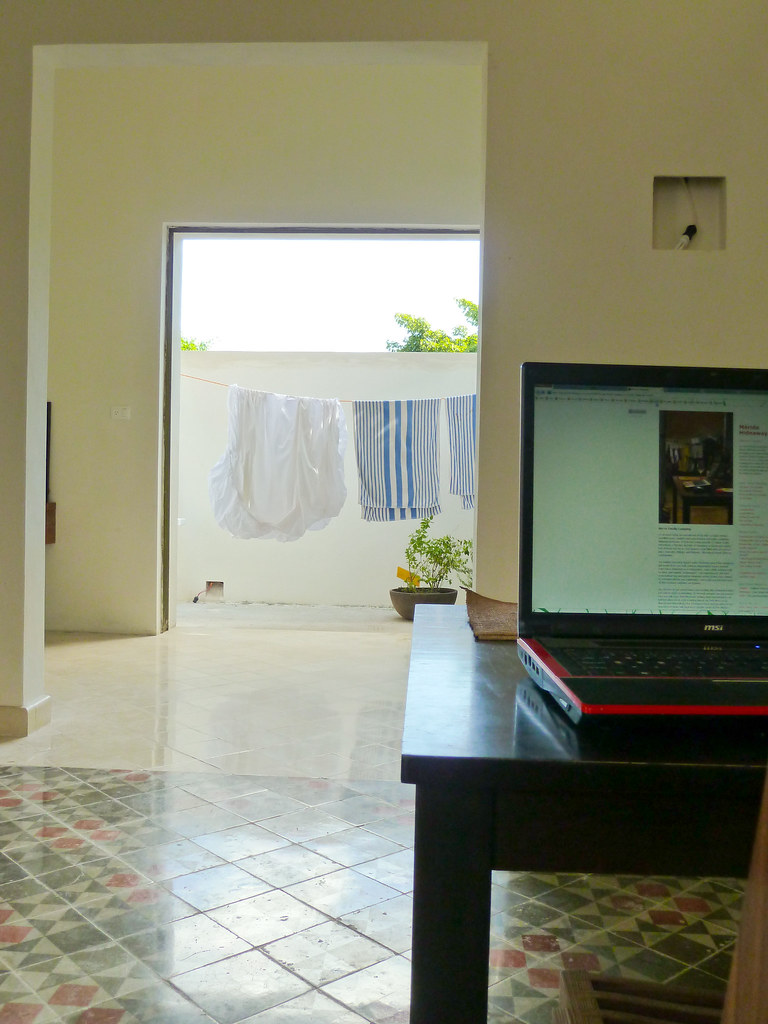
We have fitted the master bedroom with a makeshift kitchen and office, reserving the guest bedroom for our bed and storage.
The terrace between the two bedrooms has become our living room, where we wind down with a bottle of wine. After each day of construction management, it’s nice to sit quietly and watch the remaining dust of the day settle.
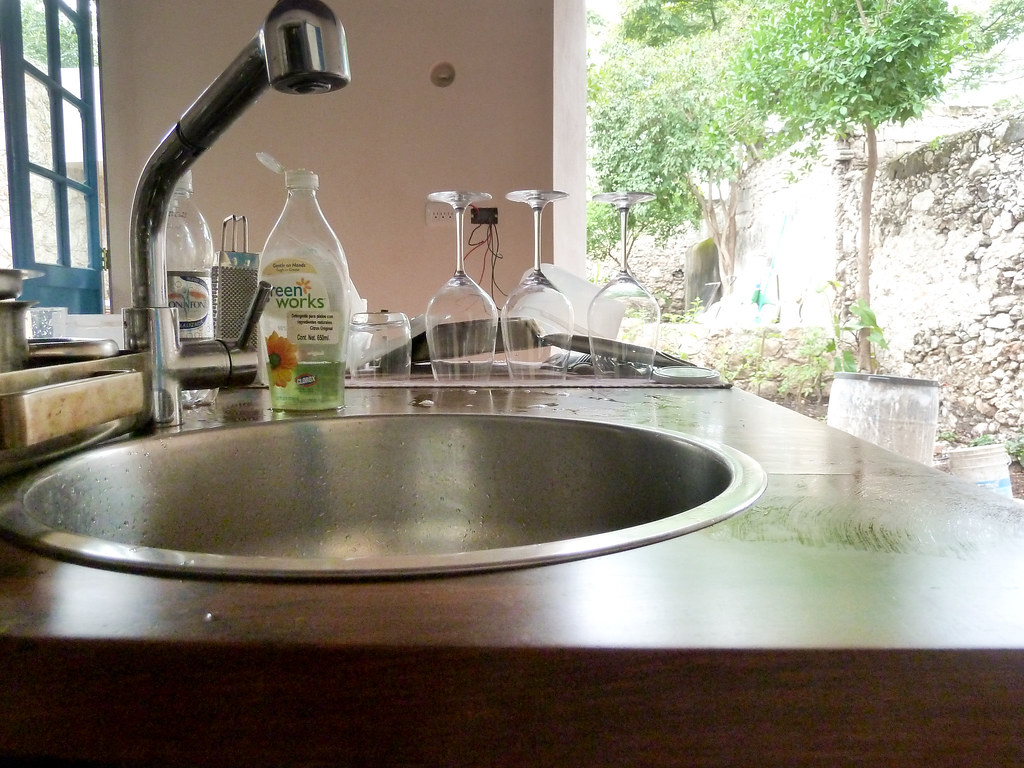
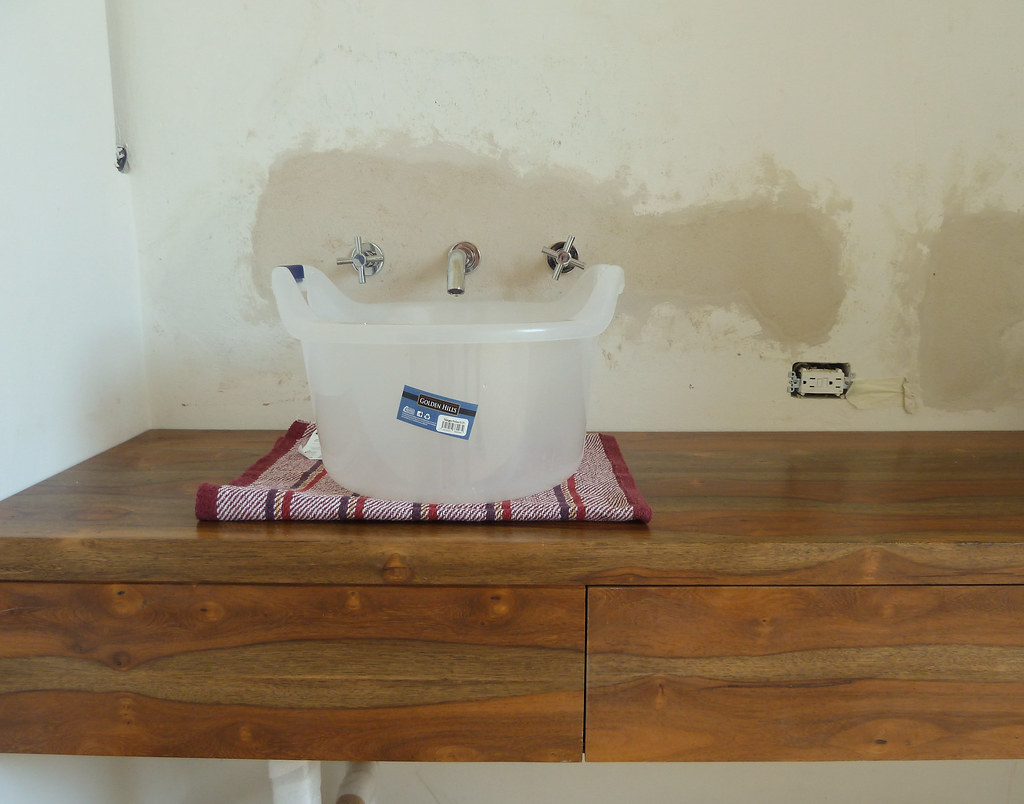
Despite having only one tap in our bathroom that also serves as the kitchen sink, we are in fine spirits.
For us this is déjà vu. Camping amongst the dust and debris, without fully functional plumbing and electricity, is where we started.
There are differences. This time around we have windows that close and doors that lock. We don’t have glass in the top sections, or paint on the frames, but we now possess a conviction that soon, these things will come to pass.
Some things, however, are just like before. Without a proper laundry, we have resurrected the old clothesline to dry our clothes. Looking over at it fluttering in the breeze, it feels like we’ve come home.
Hi, we're Brent and Stan. Since 2009 we've been designing and renovating a Spanish colonial home in Mérida, Mexico. Living and working the expat life in the Yucatán, we're always looking for interesting design projects to tackle and share.